This is one in a series of posts on using InfoPath. If you are new to SharePoint lists and InfoPath you might want to start with the Best Practices. The example I will be using here is a continuation of the one started in the Best Practices post.
Best Practices for Cascading SharePoint Lists using InfoPath Forms
Dynamically filter a drop down on your SharePoint list by another user selected value
Before you even start, be aware that using this method allows the password for the SQL connection to be stored in text format directly in the data connection. Be sure you put security measures in place to disallow others from navigating to the connection file in the SharePoint library, and create a database login with a low level of read-only security to information which is not sensitive. We are using the data connections for simple pick lists, so this shouldn’t be an issue.
Create a SharePoint library to store the data connections for InfoPath. The Type of library is a Data Connection library. Call it DataConnectionsInfoPath. The data connection information for the InfoPath connections will be stored in text format so be sure that security to this folder is limited to only administrators.
Create a SQL login to the database to which you will be connecting to get the data used in the pick lists for SharePoint. The login information will be stored in the data connection as text, so be sure to create a separate login with read only capabilities to only those tables required for the InfoPath pick lists used in SharePoint. Choose a password that is not commonly used by other admin connections. (C’mon, you know you reuse passwords).
Create a view in your database from which the pick list will be fed. The pick list can only be sourced from one table, so by creating a view you can control the values that show up in that table. If you need to filter out, change or add any values in the future, you can use the view to do it without having to change the data connection or the InfoPath form.
Navigate to the SharePoint list which has already been set up, in this case Supply Chain Scorecard Metrics from my previous blog post. Open the InfoPath form by clicking on the Customize Form button in the List menu.
To get the pick list for Site from a SQL Server view do the following.
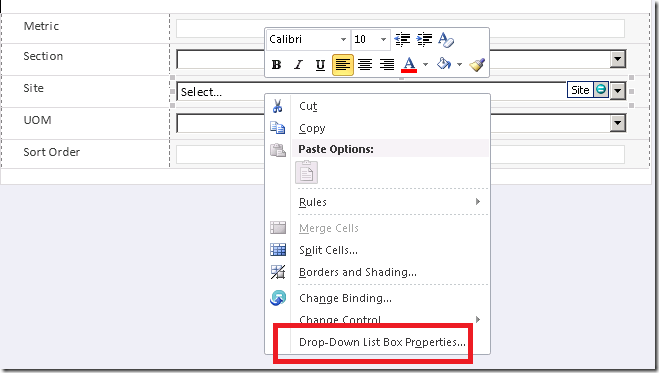
Right click on the Site text box on the form and change the control to a drop-down list box.
Right click again and edit the properties.
Select Get choices from an external data source. Click the Add button beside Data source.
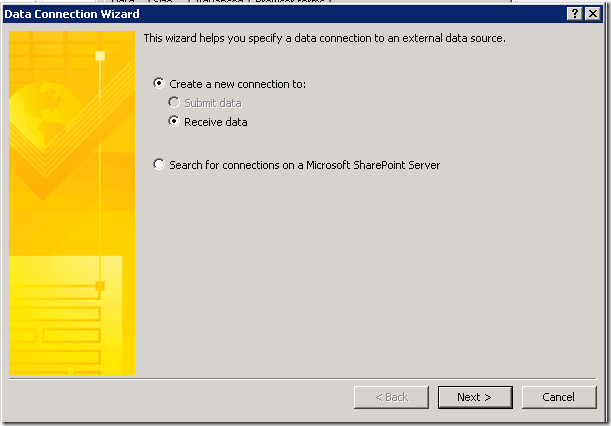
Create a new connection to Receive data.
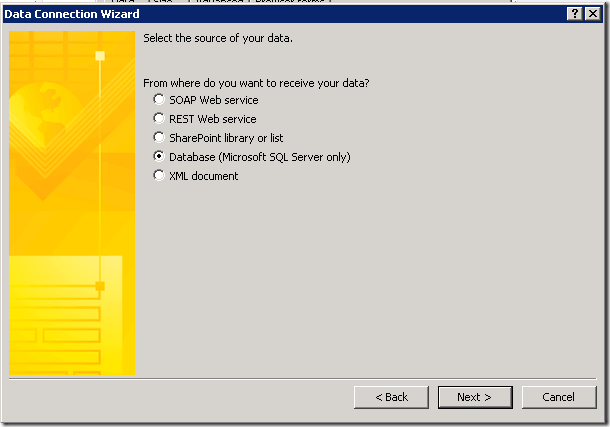
Receive data from a Database (Microsoft SQL Server only)
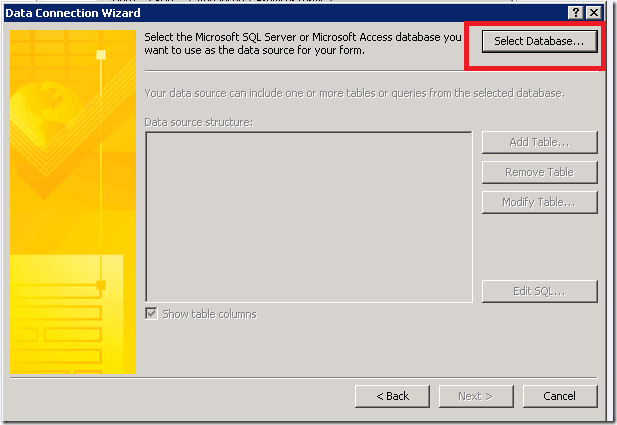
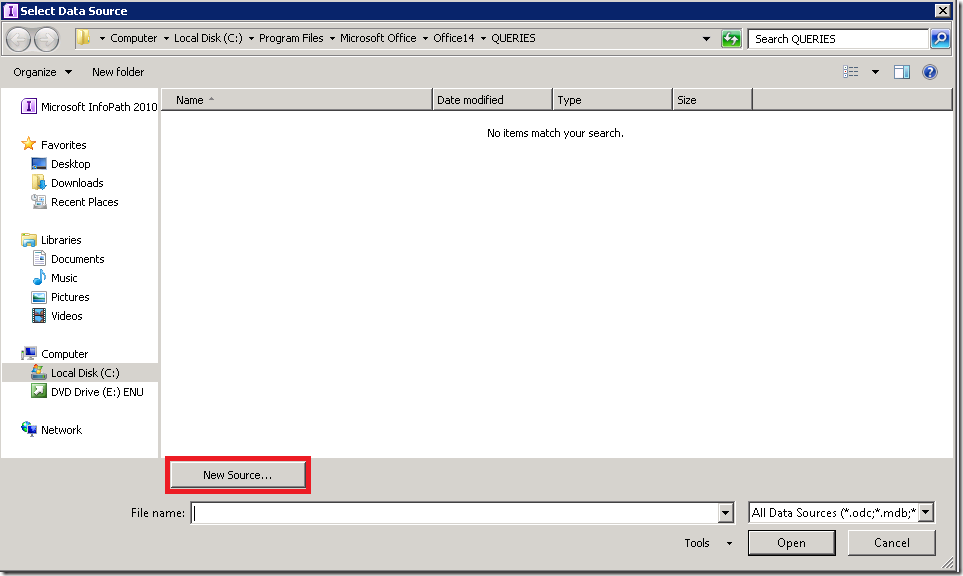
Click on the Select Database button.
Click on the New Source button
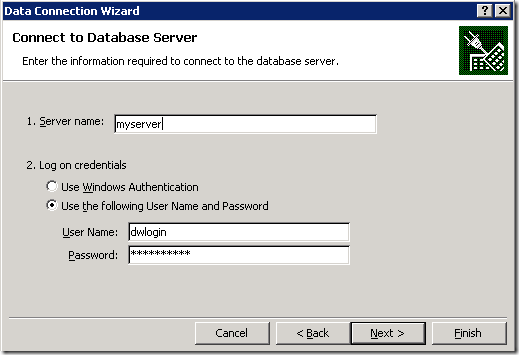
Select Microsoft SQL Server
Enter your server name and use the login you created at the beginning of this exercise.
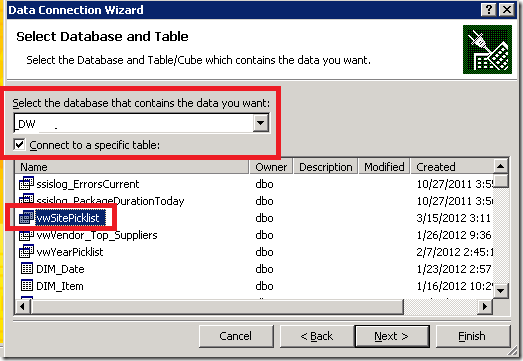
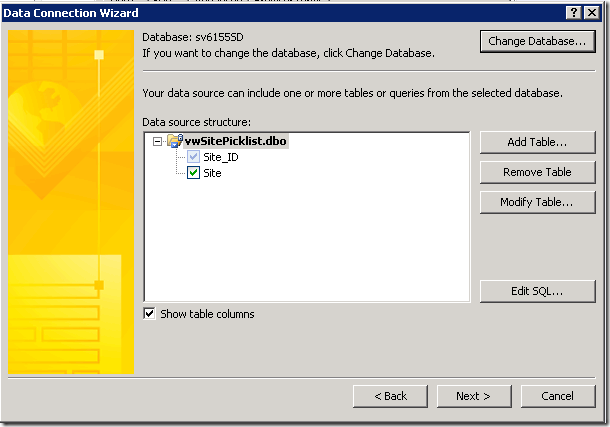
Select the database where your pick list data is stored, and select the view you created at the beginning of this exercise. The InfoPath data connection that you will be sharing in the SharePoint library will have the query imbedded in it, so you can’t just have a connection to the database. You need to choose a specific table.
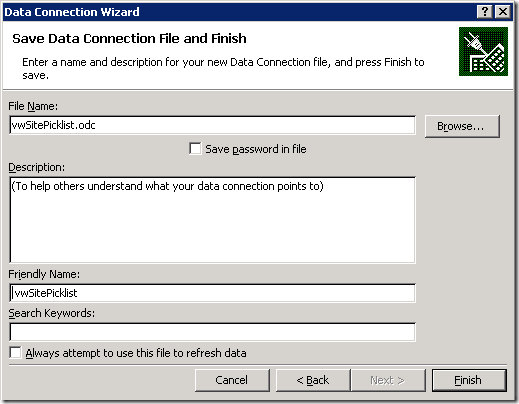
Save your connection file.
Re-enter you database password. Click Yes to save your password into the InfoPath connection file in plain text.
Click Next.
Click Next, Next, Finish.
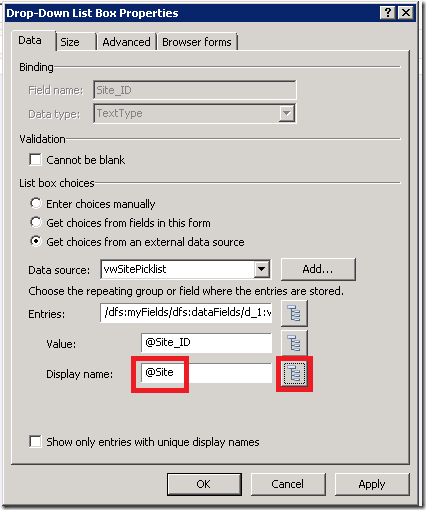
Leave the Value as @Site_ID and change the Display name to @Site by clicking on the folder tree to the right and selecting Site.
Click OK.
PUBLISH YOUR INFOPATH DATA CONNECTION TO SHAREPOINT
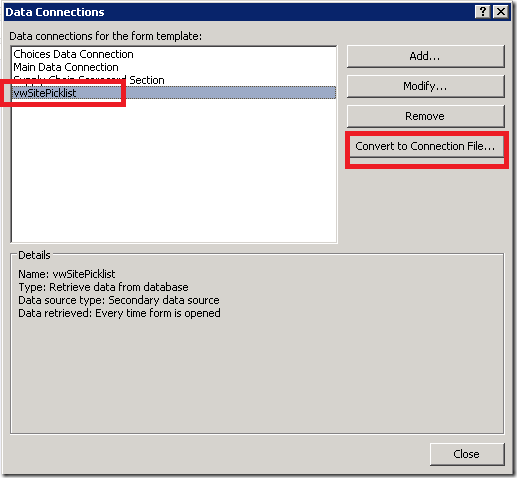
From the Data menu, select Data Connections.
Select vwSitePicklist and click on the Convert to Connection File button.
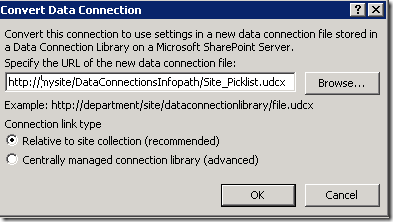
Key in the location of your InfoPath Connection library you created earlier, and add a name for the data connection you are creating. Give it a suffix of .udcx. Click OK. It will take a minute or two to create the connection.
Click Close.
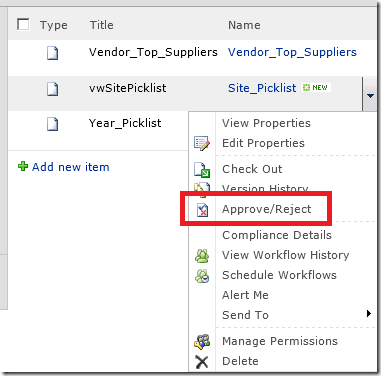
Navigate to your SharePoint library that contains the InfoPath data connections. You will see your new data connection here. Notice that the Approval Status is “Pending”. You need to change it to Approved before you can use the data connection.
Click on the dropdown beside your new data connection. Select Approve/Reject.
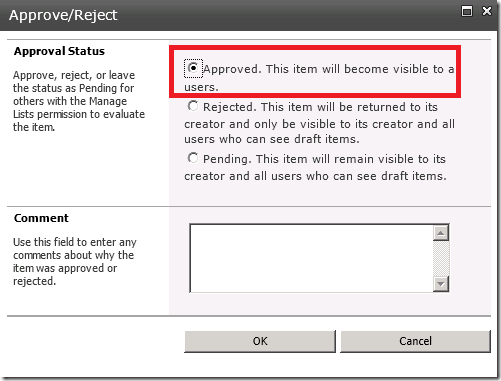
Select Approved. Click OK.
Now go back to InfoPath and publish your InfoPath form. Navigate to your SharePoint list and Add a new item. You can choose a Site from the Site pick list which is pulling directly from SQL Server.
Pretty cool, right? No need to push data into SharePoint and keep it synchronized, just pull directly from SQL Server. I love it!





Any specific changes required while doing the same in o365 as my dropdowns are populating in preview mode but when opening in browser error is “An error occurred querying a data source.” coming..Any ideas.
Hello,
Thank you! Great post. Do you know if this works with Office 365 (SharePoint Online)? I continuously receive “An error occurred querying a data source” when attempting this. For what it’s worth I’m connecting to an Azure SQL database…