A client with SQL Server 2005 asked if there was a good way to import and deploy packages automatically, rather than having to do each package manually every time. This particular client has packages deployed to SQL Server Integration Services. I have written a separate blog post on the Automating Deployment of SSIS Packages in SQL 2005. Here is the solution for importing packages.
BIDS Solution:
Open (or create) the BIDS solution for the related packages which you want to import and deploy. The related packages should all reside in the same folder on Integration Services, otherwise the deployment piece will not work as it can’t deploy to multiple folders. You will need a separate BIDS solution for each SSIS folder, and you will need to create a separate _ImportPackages.dtsx package for each solution.
In order to make this somewhat scalable, the solution folder structures will need to incorporate the exact same folder name as the folder on SSIS, since the SSIS folder name will be used in the import query. For example, if your group of packages is deployed to a folder called “Maintenance” on SSIS, you will want your solution to be called something like “Maintenance ETL”. In this way, once you create your _ImportPackages.dtsx you will be able to copy it to the next solution and simply edit the folder name in the query and the Batch File connection manager. You’ll see what I mean.
Create SSIS Package to Import Deployed Packages:
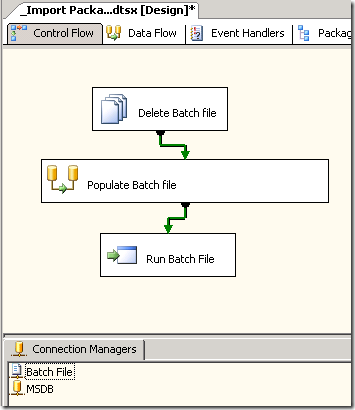
Create a new SSIS package called _ImportPackages.dtsx. I put the underscore in the name so it will float to the top of the SSIS solution when you open it, thereby reminding you to run the package and get the latest copies of the packages deployed to SSIS. The package will look like this:
CREATE CONNECTIONS
DATABASE:
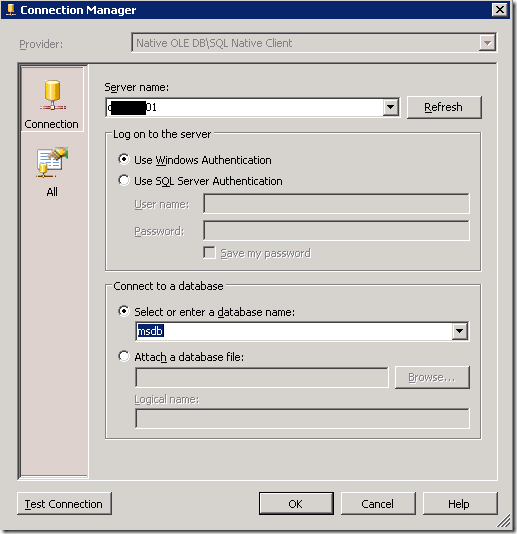
Create a connection to the msdb database on the server where the SSIS packages are being stored.
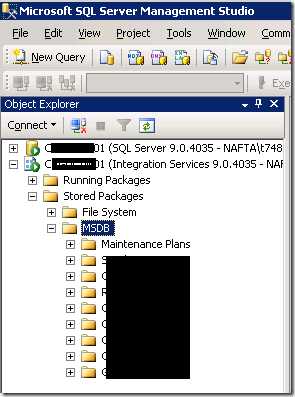
Although the packages are deployed out to Integration Services
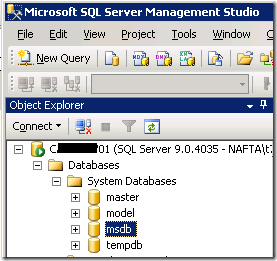
They are actually stored in the MSDB database, which is what you will write your source query against.
BATCH FILE:
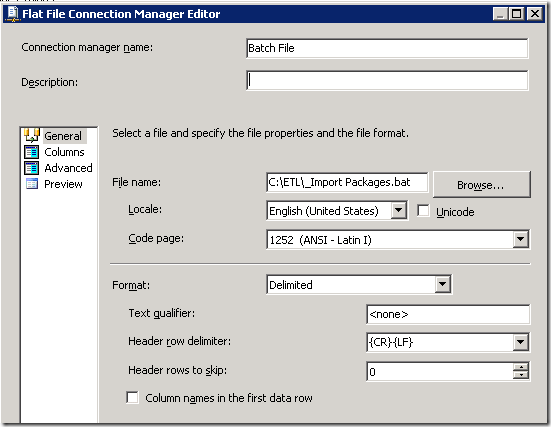
Create a Flat File Connection Manager called “Batch File”. Create a flat file called “_Import Packages.bat”. It will house the dtutil commands in a .bat file which will import all the dtsx packages from the MSDB. Choose a location within your BIDS SSIS solution folder, since you will have one of these batch files per BIDS SSIS solution.
There is one column called dtutil_command.
The column width is 4000 to accommodate the length of the dtutil command lines.
STEP 1 in the Package: Delete Batch File
Drag a File System task from the Toolbox into your Control Flow. Rename it “Delete Batch File”, and configure it to the operation “Delete file” with a Source Connection to the ”Batch File connection” you created above.
STEP 2 in the Package – Populate Batch File
Drag a Data Flow task from the Toolbox into the Control Flow surface. Rename it to Populate Batch File. Connect the “Delete Batch File” task to the “Populate Batch File” task on success. Move to the Data Flow tab and drag an OLE DB Source on the Data Flow surface. Configure it as follows:
Here is that Query again, so you can cut and paste it:
select
CAST(
‘dtutil /SQL "’
+ case
when len(FolderName) = 0 then ”
else FolderName + ”
end
+ [name]
+ ‘" /ENCRYPT FILE;"C:BI ProjectsETL’
+ case
when len(FolderName) = 0 then ”
else FolderName + ‘ ETL’ + FolderName + ‘ ETL’
end
+ [name]
+ ‘.dtsx";1’
+ ‘ /QUIET’ –suppresses prompt to delete if an older file with same name exists )
as nvarchar(4000))
as dtutil_command
from msdb.dbo.sysdtspackages90 pkg
join msdb.dbo.sysdtspackagefolders90 fld
on pkg.folderid = fld.folderid
WHERE foldername = ‘Maintenance’ —CHANGE VARIABLE
order by FolderName, [name]
The results of this query will look like this:
dtutil /SQL "MaintenancePackage1" /ENCRYPT FILE;"C:BI ProjectsETLMaintenance ETLMaintenance ETLPackage1.dtsx";1 /QUIET
dtutil /SQL "MaintenancePackage2" /ENCRYPT FILE;"C:BI ProjectsETLMaintenance ETLMaintenance ETLPackage2.dtsx";1 /QUIET
Notice that the folder name from SSIS is also used in the folder structure on the file system. You will need to adjust the query to suit your naming convention for your BIDS solutions.
Drag a Flat File Destination onto your Data Flow tab and connect the OLE DB source to the Flat File destination. Configure the Flat File destination to the Batch File connection.
Step 3 in the Package: Run Batch file
Drag and Execute Process task from the Toolbox onto the Control Flow tab. Connect the “Populate Batch File” task to the “Run Batch File” task on success. Configure the Executable on the Process tab by navigating to the _Import Packages.bat you created earlier.
Now you can run the SSIS package you just created. It will import all the packages in the specified SSIS folder into the solution folder you specified in the SQL Query.
***Please note that this will not add any new packages to your BIDS solution. It will only refresh existing packages with any deployed changes. You will still need to add the packages within the BIDS solution to the SSIS Packages folder even though they are sitting in the file system. You don’t want to simply ‘Add Existing Package’ either, as you will end up with a duplicate file in your BIDS directory. I’ve blogged a simple way to Add Multiple Packages to a BIDS solution.
